Materials Tests
|
In addition to testing services, our laboratory offers support in materials selection and consulting in compliance with standards. In particular - but not exclusively - with regard to materials that are used in electrotechnical products. With many years of experience and expertise, we will be pleased to support you in selecting suitable materials for your application. Our intensive contacts to renowned material manufacturers facilitate the selection of new materials and help with their use. Our consulting activities are not limited to plastics. We are also happy to support you in the selection of metallic materials, contact materials, auxiliary and operating materials, adhesives, sign materials, printing processes, enameled wires, printed circuit boards, electrical sheets and other materials. In addition to the selection of a technically suitable material, our focus is always on the most economical solution. In addition to the normative requirements for a suitable material for a defined application, compliance with legal requirements (e.g. substance-relevant regulations such as RoHS II and REACH) and consideration of customer-specific specifications naturally also play an important role.
On request, we will also be pleased to take over materials management for you so that, on the one hand, it is ensured that only materials that are qualified and tested are used and, on the other hand, the variety of materials in your company is sensibly limited by central materials management. The bundling of materials creates economic and process advantages for your company.
In addition, we offer you an extensive testing portfolio in the area of material and component testing.
|
Industrial Computer Tomography
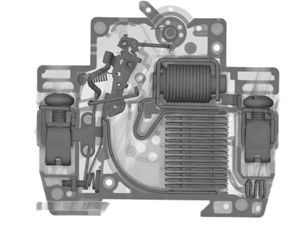
I²PS is now a CT service provider for the electrical industry. With our 2D and 3D computed tomography capabilities, we offer our customers non-destructive testing of their products.
In quality assurance, development or damage analysis, industrial computed tomography (ICT) offers reliable inspection of defects, internal structures and geometric measurements.
Including DAkkS Calibration according to IEC/ISO 17025!
The powerful 500 W X-ray tube with an X-ray voltage of 225 kV enables a wide range of parts to be inspected - making the system suitable for denser parts and multi-material components.
Typical analyzes are:
- CT scan for three-dimensional visualization of components and devices
- Housing wall thickness and defect analyses
- Checking the assembly and joining technology
- Dimensional measurements to check the dimensional accuracy (target/actual comparison)
|
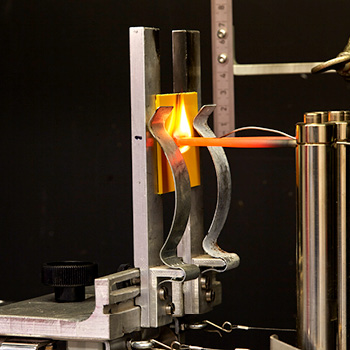
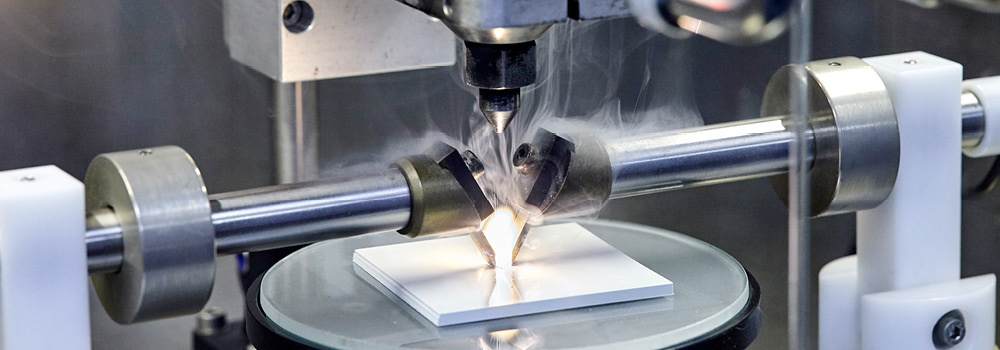
The behavior exhibited by materials when subjected to abnormal heat or fire is crucial when it comes to the operational reliability and safety of a product, especially in the case of electrical products. Accordingly, a large number of methods that can be used to test the flammability properties of materials can be found in IEC, DIN EN, ASTM, and UL standards. We can perform glow wire tests (GWT), GWFI, GWIT, GWEPT, needle flame tests (NFT), and horizontal and vertical flame tests in conformity with IEC/UL classifications HB, V0, V1, V2, 5VA, and 5VB. Depending on the specific testing method used, these tests are performed on material specimens, components, or complete devices.
|
Relevant Standards: DIN EN / IEC 60695-2-10, -11, -12, -13, 60695-11-5, 60695-11-10, 60695-11-20, 60335-1, UL 94, UL 746C, CSA 22.2 No.14 DUTs: |
|
An important electrical property of plastics for evaluating their suitability as insulating materials in electrical equipment is the tracking resistance. It is determined by a standardised method for determining the comparative number (PTI/CTI A/B) by creepage path formation on solid insulating materials when a test solution is dripped on. The test equipment allows the test to be carried out for voltages up to 600 V. The PTI/CTI value of a plastic material depends considerably on the additives used and can therefore differ significantly for the same base polymer depending on colouring or optimisation (e.g. laser pigmentation). Further electrical measurements in the form of resistance measurements (track resistance, contact resistance, contact resistance, ...), high-voltage tests or insulation strength tests are carried out in particular before and after environmental simulation tests (climate tests under low/elevated temperature and/or humidity). In close coordination with the customer, a wide variety of functional tests can also be carried out and monitored.
|
Relevant Standards: DUTs: |
|
Our chemical laboratory is able to conduct a comprehensive range of wet chemistry analyses and tests that include, for example, determining the chemical resistance of devices, components, and material specimens exposed to lubricants, corrosion inhibitors, or cleaning agents. Other tests and analyses focus on:
- Resistance to corrosion (e.g., ammonium chloride test, bimetallic corrosion)
- Resistance to ozone
- Resistance to chemicals
- Exudation and outgassing
- Fillers, additives, and reinforcement materials in materials
- Degree of cross-linking (e.g., irradiation cross-linked plastics)
- Curing behavior (e.g., duroplasts)
- Viscosity measurements
- Properties of oils and greases
- Stress cracking behavior
- Weight loss (µg range)
- Moisture content (e.g., in plastics)
- A wide variety of traditional wet chemistry procedures
|
Relevant Standards: In addition to customer-specific specifications, various national and international standards such as: DUTs: |
|
In many applications, the surface of a material can be crucial to the function (friction, contact problems due to corrosion/soiling, adhesion properties for adhesives/surface finishes, surface quality of coatings (pores), color, etc.). This is why it is important to know what the surface properties of a material are in detail. Therefore I²PS offers a series of surface analysis methods.
For example, a non-contact profilometer can be used to examine the macrostructure of a surface by means of a laser area scan that creates a virtual map of the surface. And a chromatic sensor can be used to obtain more detailed insights into the surface by, for instance, measuring surface roughnesses down to Ra1 with a line or area scan. In addition, digital microscopes, optical microscopes, and a scanning electron microscope are available for analyzing surface microstructures. Metal surface coatings (several coatings on top of each other) can be identified and quantified in a non-destructive manner with the use of radiographic coating thickness measurements.
All in all, we will make sure to provide you with the analysis methods that best fit your needs.
|
Relevant Standards: ISO/TR 14368, DIN EN ISO 4287, 4288, 16610-21, 3882, 3497, EN ISO 25178-1, -2, -3, -6, -602 DUTs: |
|
When dealing with unknown materials, incoming goods inspections, or complaints, or when checking compliance with the substance restrictions effected in regulations such as RoHS and other environmental protection legislation (e.g., REACH, Proposition 65), being able to reliably identify the composition of a material or the actual material itself can prove to be important.
I2PS offers a variety of analysis options that effectively address this need. Among them, energy-dispersive X-ray spectroscopy is an outstanding choice for the local analysis of compositions, as well as for identifying impurities and analyzing phase separations, phase boundaries, and similar phenomena.
Moreover, we offer Fourier-transform infrared spectroscopy (FTIR) for identifying and verifying organic materials. When using this technique, molecular groups are excited with the use of infrared radiation, and the absorption of specific wavelengths in the measured IR spectrum provides each material with a unique "fingerprint." This fingerprint can then be compared with databases (spectrum libraries) in order not only to identify materials, but also to corroborate the absence of various substances/additives. Within this context, we have a comprehensive proprietary database of analyzed materials that spans years of testing and that guarantees unparalleled results in combination with the other tools at our disposal.
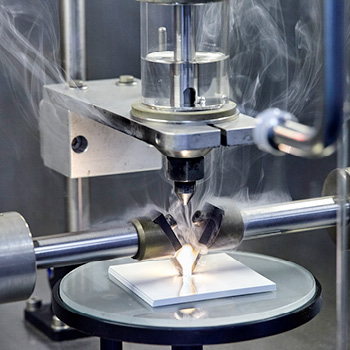
When it comes to detailed analyses of the composition of metallic materials, we use an arc spark spectrometer, which makes it possible to identify not only heavy elements, but also lighter ones such as carbon. In this method, a spark is used to vaporize and excite a small part of the specimen material. The spectrum of the resulting light emissions is then analyzed, making it possible to identify elements and element concentrations.
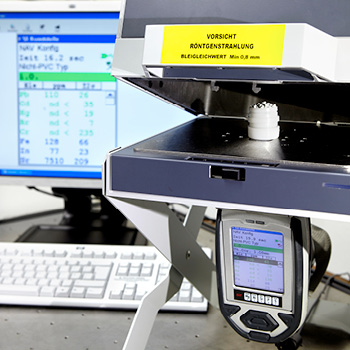
A fast option for determining material compositions on specimens with inorganic components is X-ray fluorescence spectroscopy (XRF spectroscopy). This mobile method can be used for RoHS analyses (screening element analyses used to check plastics, metals, etc. for elements prohibited as per the RoHS Directive) as well as to quickly analyze metal alloys. It is particularly well-suited to quick analyses of large numbers of specimens (e.g., in order to verify the concentration of bromine in molded plastic parts). However, its resolution when it comes to lighter elements is weaker than that achieved with optical emission spectroscopy.
In addition, we can perform wet chemistry analyses to check for individual substances or examine compositions at our chemistry laboratory.
|
Relevant Standards: DIN EN 16424, 15079, VDE 0042-1-3-1, DIN EN / IEC 62321-3-1, RoHS (2011/65/EU), DIN ISO 22309, DIN 51008-1, DIN EN ISO 3815-1, ISO 19272 DUTs: |
|
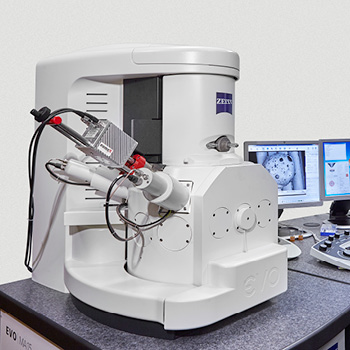
Scanning electron microscope (SEM) with energy dispersive X-ray spectrometer (EDX)
Our scanning electron microscope uses electron beams for imaging analyses, and we have various detectors available depending on the specific application at hand (SE, BSE, VPSE detector). With magnifications of 20x to 300,000x and an extremely deep depth of field, our SEM makes it possible to obtain highly detailed and accurate images of surfaces from an extremely wide variety of specimens and materials. Accordingly, our SEM is very flexible and can be used for an extremely broad range of applications going from analyzing the fracture grain structure of a hardened steel component (hydrogen embrittlement), to the links between the glass fibers in a polymer matrix, to the microstructure in semiconductor elements, all the way to insect wings, just to name a few examples. Thanks to the use of low-vacuum technology, we can also analyze non-conducting surfaces (such as plastics) in our SEM without the need for sputter coating (which is normally used to cover specimens with a conductive surface).
At I2PS, we often use our SEM for failure analyses, materials analyses, and surface analyses in combination with metallographic structure analysis methods.
Finally, our energy dispersive X-ray spectrometer (EDX) can be used simultaneously with a SEM analysis in order to perform a materials analysis, i.e., to measure element compositions and distributions (point, line, and area scans for analyzing the distribution of specific chemical elements in a specimen). This makes it possible, for instance, to identify structure inhomogeneities and impurities in specimens.
|
Relevant Standards: DUTs: A relatively large specimen chamber (vacuum chamber) ensures that complete devices can be analyzed as well. |
|
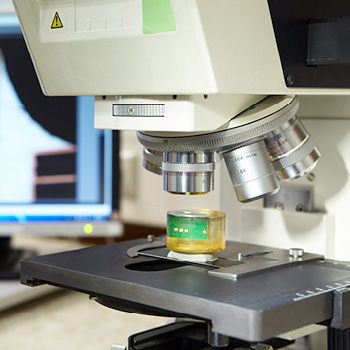
Our metallography services focus on structural analyses (microsections) of both metallic materials – e.g., contacts, screws, metal sheets, sintered metals – and molded plastic parts (e.g., microtomy, transmitted-light microscopy). This is especially valuable when taking into account the fact that the thermomechanical treatment of a component (e.g., influence of heat treatments, process parameters) is reflected in its microstructure. This means that this microstructure can be used to obtain insights into preceding heat treatments (e.g., hardening, quenching and tempering, case hardening, normalizing) or other process parameters (e.g., surface treatment or the development of amorphous zones in semicrystalline plastics due to fast cool-down speeds). Moreover, the microscopic examination of microsections is an important analysis method when qualifying materials and processing methods (e.g., soldered joints, welds, coatings) and when performing failure analyses. In addition, it is often used as a specimen preparation method for more in-depth examinations, such as SEM/EDX analyses used to analyze the chemical composition of individual particles or phases in a structure or to screen element distributions. All results are evaluated by materials experts with years of experience.
Testing equipment:
- Reflected-light and transmitted-light microscopy (differential interference contrast, bright-field/dark-field), magnification of 16x to 1,000x
- Stereoscopic microscopy, magnification of 4x to 100x
- Digital microscopy with image analysis (0x to 200x)
- Visualizer for macro photos
- Digital image analysis and photo documentation, phase or particle size distributions
- Microscopic metrology (e.g., coating thickness measurements, fiber lengths, pore size/distribution)
Specimen selection and preparation:
Specimen preparation with cutting, embedding, grinding, polishing, etching Microtome preparation (e.g., plastics)
|
Relevant Standards: DIN EN ISO 4499, 643, DUTs: |


